Convert a Motion-Based Trajectory Into a Waypoint Trajectory for Skydel
Technical & Application Notes
Working with Skydel + Trajectories
The Skydel software engine has an integrated tool for building trajectories. A vehicle simulation trajectory type is a great way to quickly make a realistic trajectory. You can import map data from OpenStreetMap, Google Earth, or your own CSV file.
In this example, we use “OpenStreetMap” (openstreetmap.org). Refer to the User Manual for more information.
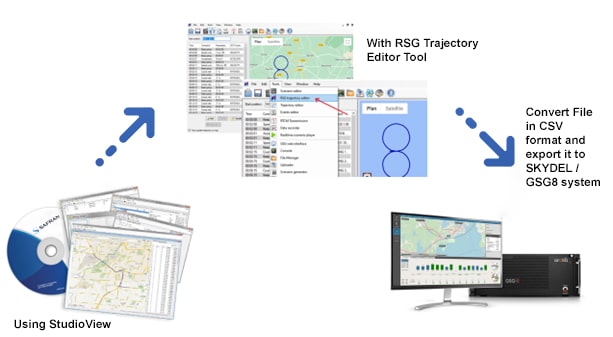
For customized trajectories, like off-road or aircraft scenarios, Safran’s StudioView Software is a good complement. GSG StudioView was originally designed for the GSG-5/6 simulator generations but can still help to setup scenarios and test simulator units of current and future generations.
For Skydel users, StudioView is a toolbox for generating files that can be used with GSG-8, GSG-7, and Skydel. It can be especially useful for building trajectories or antenna patterns and Rinex file modifications. This document will describe how to export a motion-based trajectory file (.traj) from StudioView to be used by Skydel.
To convert other formats (.nmea, .csv, .gpx, .kml, .kmz) from StudioView into a Skydel format, please refer to the application note Building trajectories for Skydel systems.
Tip: A Free StudioView License is available online via Safran web site (Windows platform).
Converting a Trajectory
Let’s begin by using StudioView to convert motion-based trajectory files (.traj) into waypoint trajectory files (.csv) and open them in Skydel (or a Skydel-based system such as a GSG-7/8).
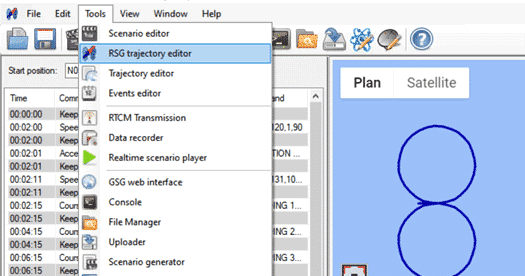
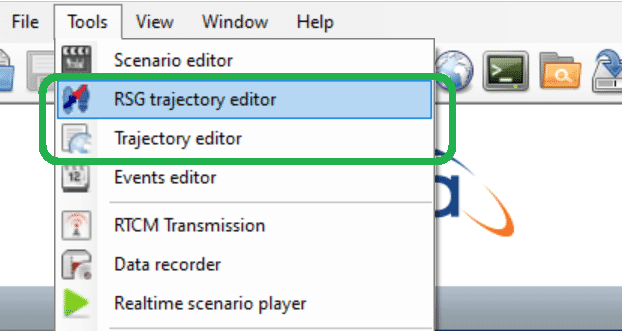
StudioView Software has two distinct tools to help users build a trajectory script:
- Trajectory Editor: Used to manually create a trajectory as a sequence of waypoints through a Google Maps plugin.
- RSG Trajectory Editor: Used to describe a motion-based trajectory (proprietary format) – In this case, you don’t create a waypoint list but a sequence of commands to change position and/or attitude for the vehicle.
For this application note, we will only explain the use of the RSG trajectory editor tool.
User manual link for detail:
https://safran-navigation-timing.com/manuals/GSG/Content/GSG/Topics/Tasks/SV_Trajectory.htm
Example – Trajectory conversion
An example of trajectory script made by StudioView is provided with this application note. This trajectory file is one of the samples provided by default when installing StudioView.
Preparing your StudioView trajectory file
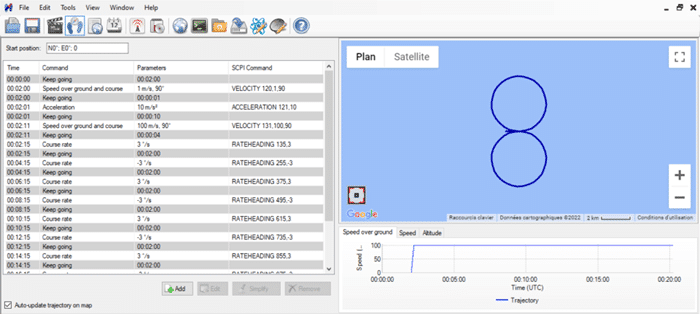
The RSG Trajectory Editor allows users to manually create trajectory as a sequence of motions. It contains a Map window, Motions table, and Velocity and Height charts, while tools provides common GoogleMap functions.
Note: An internet connection is needed for updating the map, there is no offline process for StudioView to use the GoogleMap plugin.
To build your vehicle trajectory, you can add a direction or a speed command at a specific time.
Opening the file with StudioView will automatically display the trajectory on the map and list the motions on the left side. You can also see a graphical view of speed and altitude. Each motion can be modified.
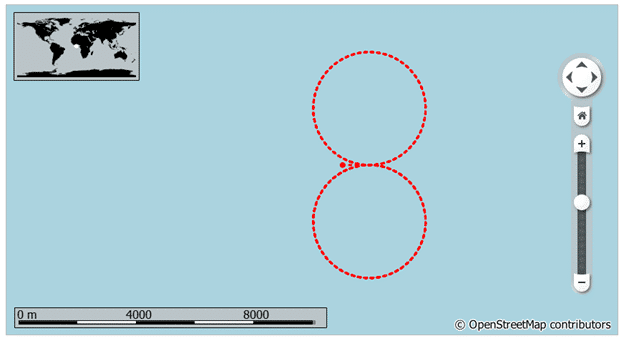
Open your TRAJ file on StudioView or create a new one (the StudioView template file used in this example is FigureEight.traj). The files GPPRSG.traj, SineWave.traj, and SquareAndLoops.traj are also available in the GSG StudioView repository.
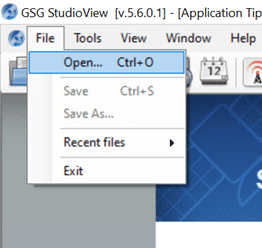
Once the file is loaded in StudioView, you can convert your trajectory into a CSV format. To do this, export your file by clicking on the “File > Export“ button.
You can select and name a new file in the output trajectory field.
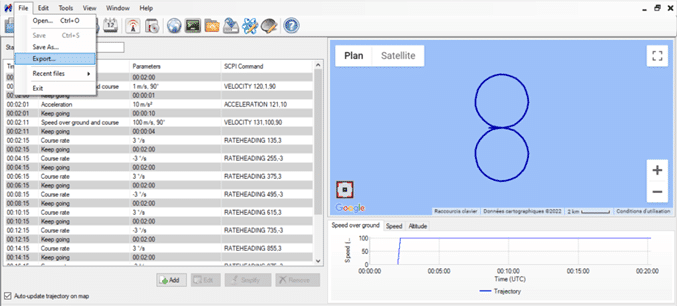
When saving files choose the Skydel CSV format.

Click “Save”.
Import your CSV file into Skydel
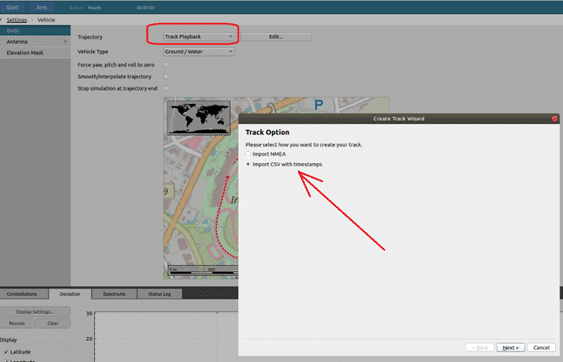
When preparing your Skydel scenario, go to vehicle body model and select the Track playback mode.
Select the option “Import CSV with timestamps”.
The detailed description for using the vehicle motion tab is available in the Skydel user manual.
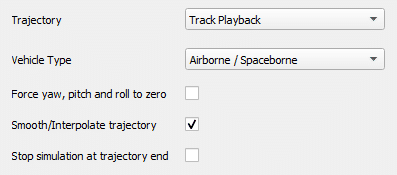
The Skydel menu also allows you to smooth/interpolate the file. Your prepared StudioView file is ready to use and — if you have no other changes – does not need any additional processing. However, because the Skydel simulation engine runs at 1000 Hz, the imported trajectory must be interpolated. For low speed or low dynamic motion cases, a linear interpolation should be sufficient to keep a continuous tracking, but for aircraft trajectories, we strongly recommend using Skydel’s Smoothing tool.
When converting StudioView files to Skydel, Safran recommends always selecting the Smooth/Interpolate option with Airborne/Spaceborne Vehicle Type. This can be done even if your trajectory is for a ground vehicle. Skydel will apply a cubic spline interpolation function between plots with no modification of the original trajectory.
From this menu, you can also select if the scenario will stop or not at the end of the trajectory.
When processing the file for import: select Column separator “,” and skip the first Header line generated by StudioView format. This will properly separate the values to process and exclude the unneeded lines.
Position format is LLA. Select appropriate columns and define the unit for each parameter. (see the example below). Columns 2,3 and 4 are respectively for Latitude, Longitude and Altitude.
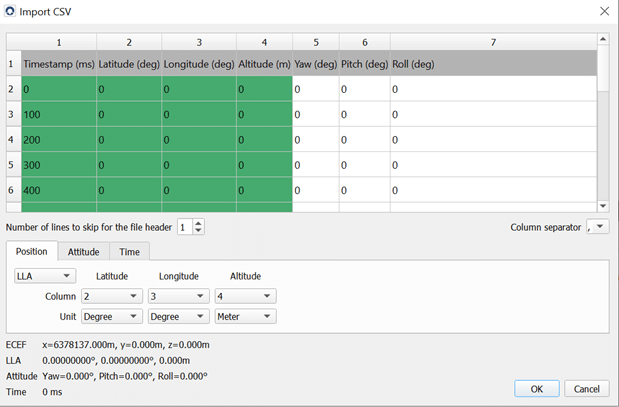
When importing RSG trajectory files, you have the option to also import attitude changes on column 5, 6 and 7.
Time is available in column “1”. Select it and set Type as “Elapsed” and Unit in “Seconds”

When all parameters are set, you can submit the import process by pressing “OK”. Then, you can include the trajectory into your scenario (skydel.sdx file) by clicking on “Finish”.
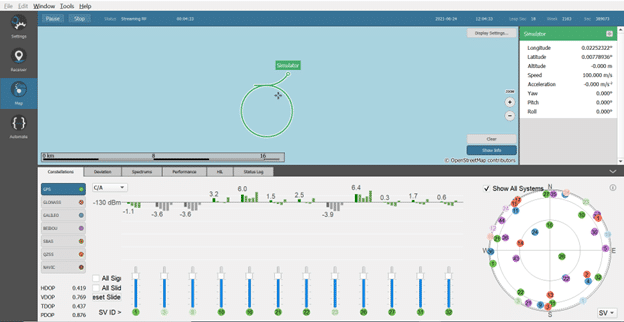
Launch your Skydel scenario
Once your trajectory file is loaded, you can create a Skydel configuration file (by choosing your constellations, frequency bands, navigation parameters, etc.) and launch the simulation using the START button.
Summary
We hope that this application note was helpful in explaining how to convert a trajectory for use in Skydel-based simulators. With this tool, you are now able to use the StudioView Tool and build a wide range of trajectories for your Skydel scenarios and simulations.
StudioView resources
Video tutorial (Watch the first minute to see presentation of how to use the trajectory tool) : https://www.orolia.com/resources/videos/building-gps-simulation-scenarios-gsg-studioview-software
Tip: A Free StudioView License is available online via the Safran website (for Windows platform): StudioView Documentation and Download
Skydel resources
GSG-8: Advanced GNSS Simulation Tutorial:
https://safran-navigation-timing.com/building-gps-simulation-scenarios-with-gsg-studioview-software/
Get information about vehicle setup following this link:
https://safran-navigation-timing.com/manuals/skydel/index.html#settings-vehicle-body