+1.585.321.5800
Front Panel Keypad, and Display
Note: This Section applies to NetClock 9483 only.
To simplify operation and to allow local access to NetClock, a keypad and a 4-line LCD information display are provided on the front panel of the unit.
The front panel keypad and display can be used to configure basic network settings e.g., en-/disabling DHCP, or setting an IP address and subnet mask.
Note: If the keypad becomes locked, see Troubleshooting – Keypad Is Locked.
Using the Keypad

The functions of the six keys are:
- tu arrow keys: Navigate to a menu option (will be highlighted)
- pq arrow keys: Scroll through parameter values in edit displays
- ü ENTER key: Select a menu option, or load a parameter when editing
- Ò BACK key: Return to previous display or abort an edit process
Navigating the Front Panel Display
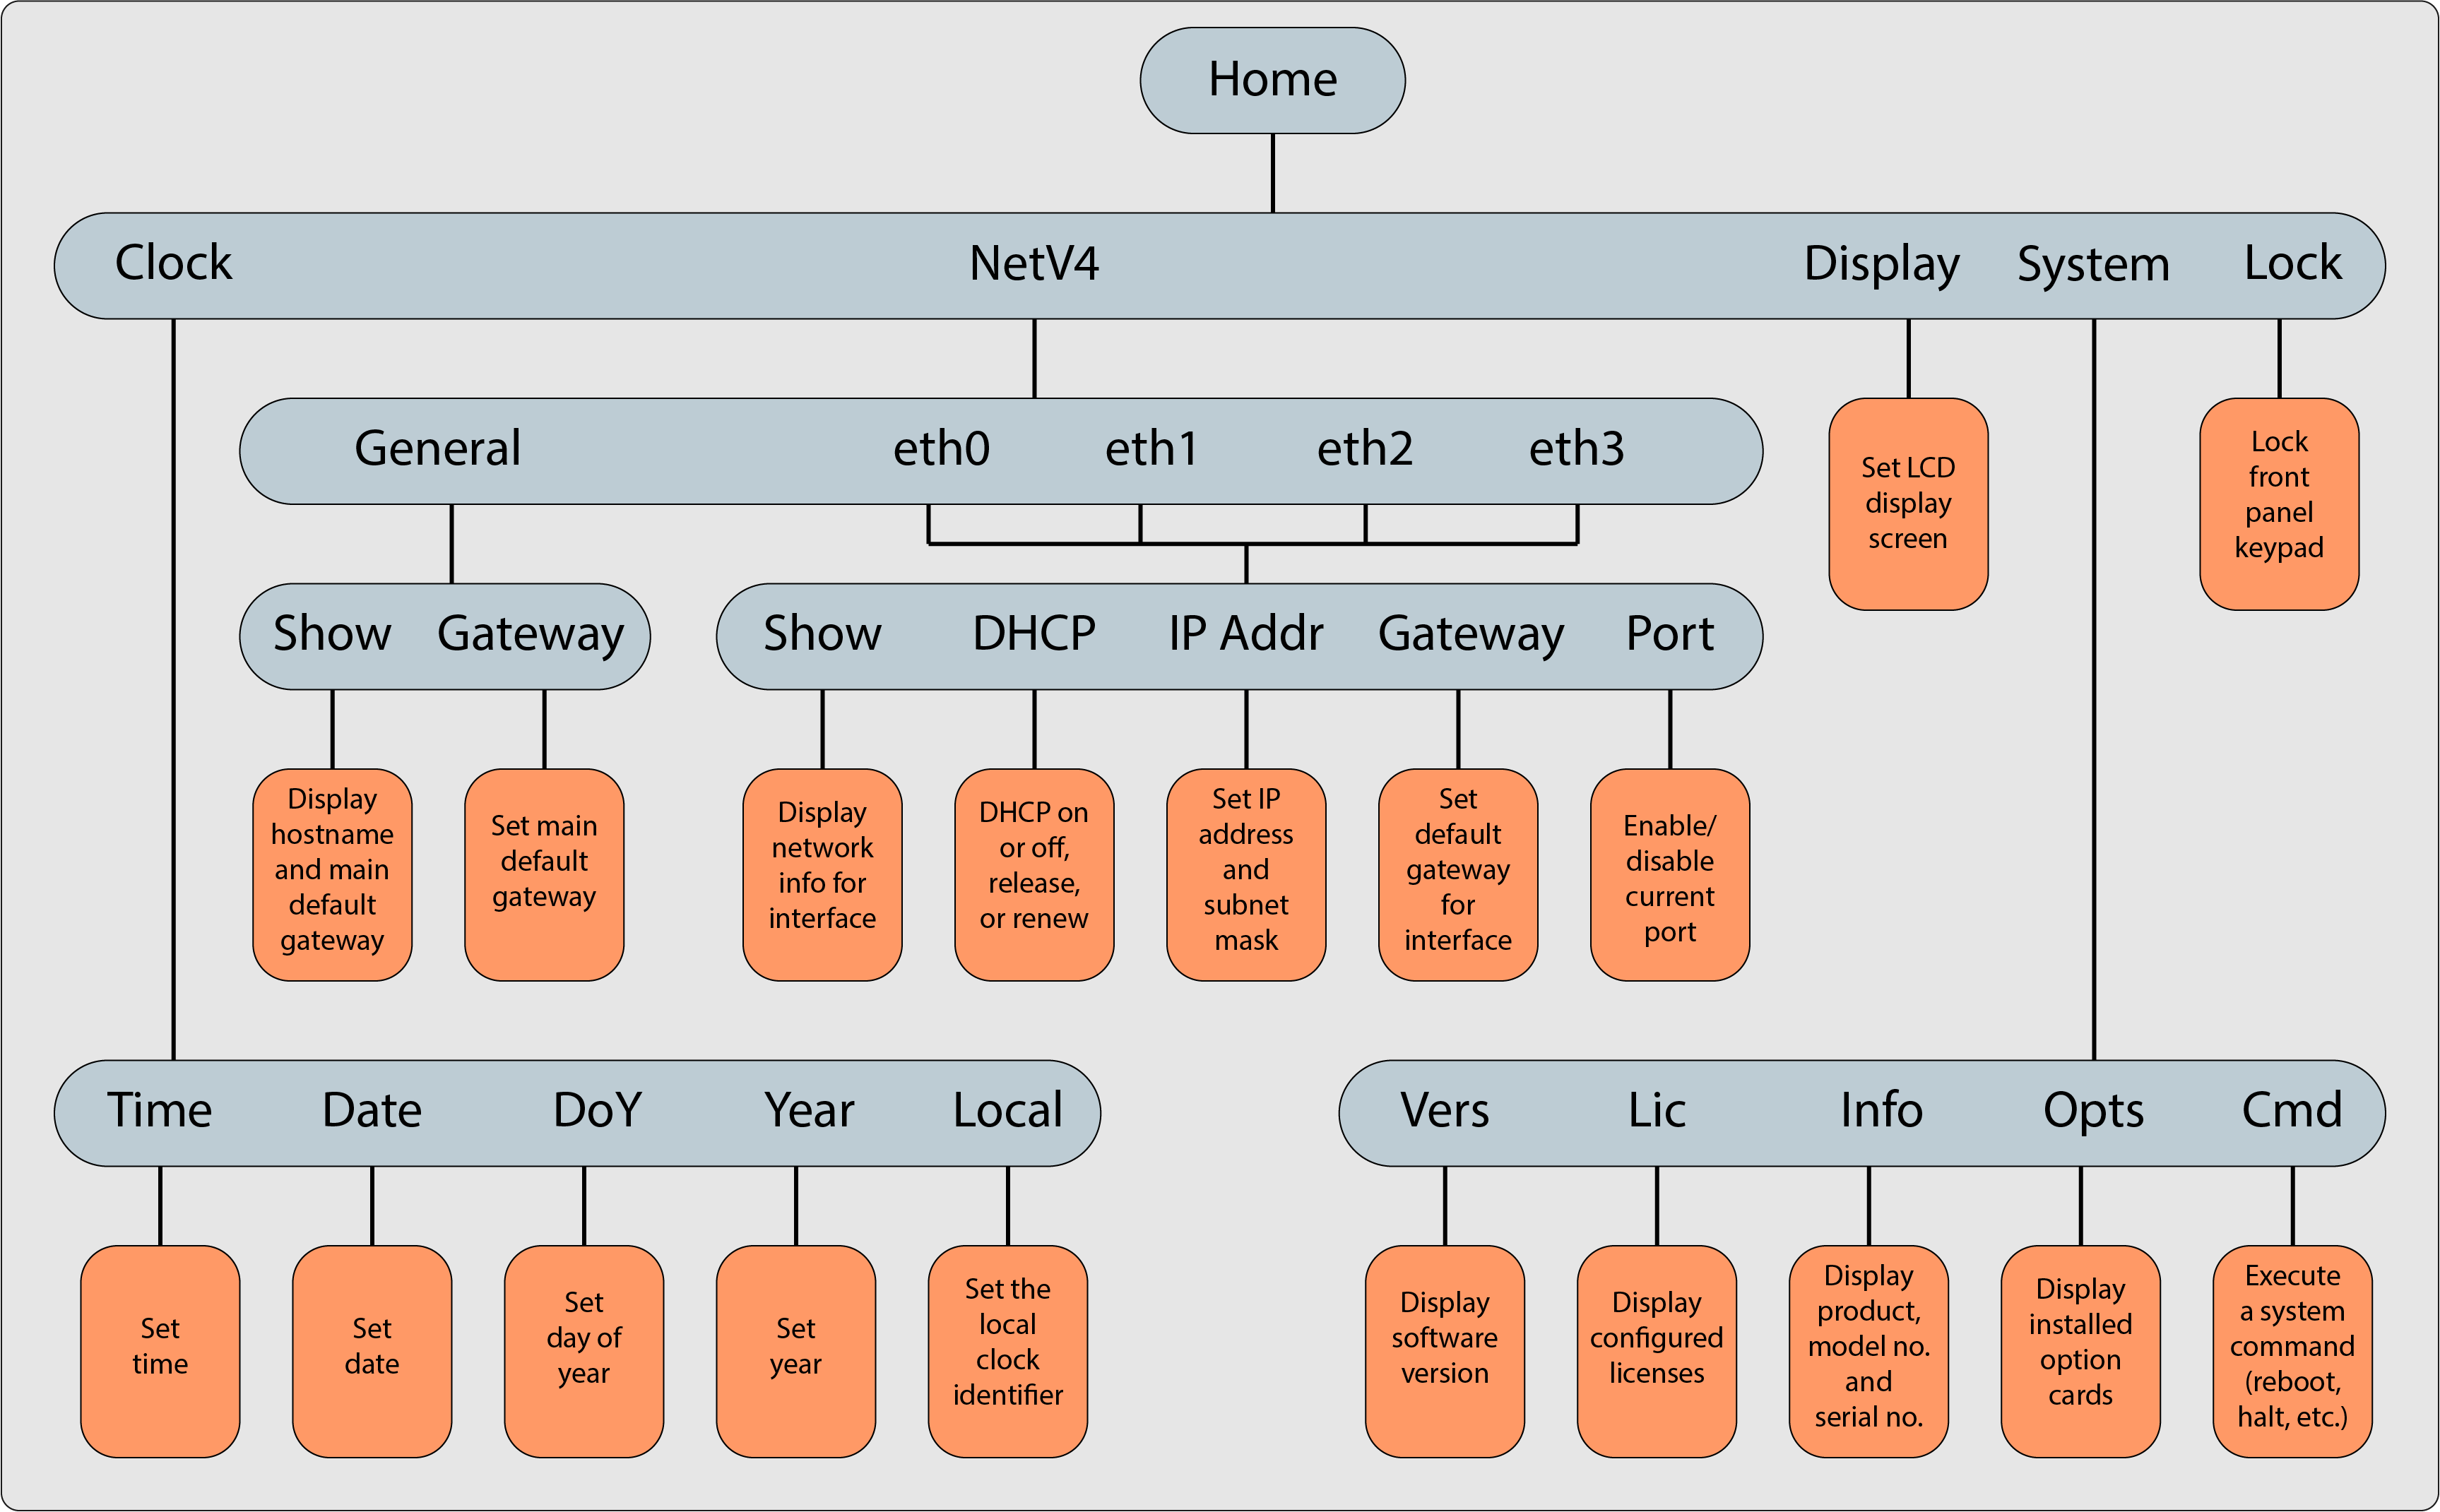
After power initialization, press any key to go to the “Home” display. As shown in the illustration Front panel menu tree, several status and setup displays are accessible from the main “Home” menu. To navigate through the menus, use the arrow keys to highlight a selection and then press the ENTER button.
The main menu options and their primary functions are as follows:
- Display: Used to configure the information display
- Clock: Displaying and setting of the current date and time
- System: Displaying version info, system halt and reboot, reset
spadminpassword - Netv4: Network interface configuration
- Lock: Locks the front panel keypad to prevent inadvertent operation.
Front Panel Display: Menu Tree
The illustration below shows how the menu is organized, and which functions can be accessed via the front panel (i.e. without using the Web UI):
To modify a parameter:
- Highlight the menu option and press the ENTER button.
“O” stands for current old setting, and “N” is the new setting.
You can only change the “N” setting.
Use the UP and DOWN arrow keys to scroll through all possible parameter values.
To edit a sequence of numbers:
- Use the LEFT and RIGHT arrow keys to select other digits. Once the desired parameter is displayed, press ENTER to make the new value the current ("O") value. You will be asked to confirm the setting change. Press ENTER to accept or BACK to cancel the parameter change.
All entered values are stored in the unit's non-volatile memory and will be restored after a power cycle.